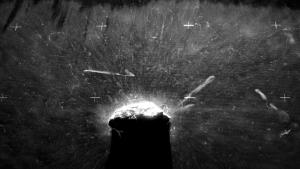
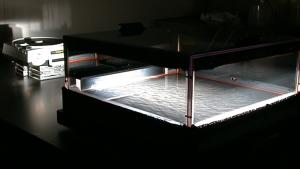
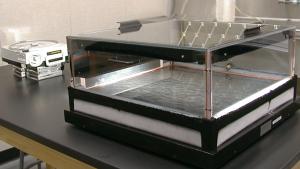
A large diffusion cloud chamber filled with supersaturated alcohol vapor allows for the observation of the tracks left by ionizing radiation particles. The chamber is cooled with dry ice or another cooling agent to maintain the supersaturation. As charged particles pass through the chamber, they ionize the vapor, creating visible trails of condensation. This demonstration is used to study the properties of radiation and to visualize the paths of different types of subatomic particles.
Preparation Steps
- Ethanol: Use fresh 95% ethanol only. Do not reuse ethanol for this demo. Ethanol can be retrieved from Lab Stores, they buy it by the drum and will fill our container. Each use requires approximately 500 mL of 95% ethanol. Use about half of the 500 mL to saturate the felt around the top of the diffusion chamber and pour the rest on the chamber bottom to provide a uniform, low-glare surface. Avoid splashing on the side walls. Make sure to add the alcohol before cooling the chamber.
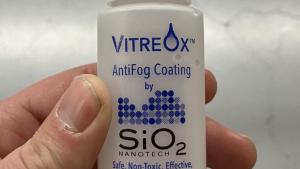
- Glass Top: Replace the glass top and ensure it sits flat in its place. Clean the outside glass top with an antifogging solution. We use Vitreox Anti-Fog Coating but other products should work as well.
Dry Ice Handling: Use caution while handling dry ice. Wear thick blue thermal gloves. Choose solid slabs of dry ice that are the same thickness so the chamber bottom will be level and in contact with all the dry ice. 6 slabs of dry ice is good but it is possible to perform with as little as 4.
Ice Preparation:
- Get three slabs and cut each of them into three equal-size chunks using a metal spatula and hammer. (Be careful not to break the ice into small pieces.)
- Distribute the chunks evenly on the foam base of the chamber, leaving at least 1 inch to the edge of the foam.
- Stretch the elastic skirt around the corner supports to reduce dry ice consumption and place the chamber on the dry ice.
- Chamber Leveling: Level the chamber. If the chamber is not level, adjust the foot pegs of the chamber until the fluid is evenly distributed across the floor of the chamber.
- Thermal Equilibrium: The chamber may be ready in as little as 15 minutes, but allow 30 minutes to reach thermal equilibrium. It will continue operating for up to 8 hours.
- Projector & Lighting: With room lights darkened, shine the slide projector through the thick Plexiglas on the partially masked side. This provides good light at the active volume of the chamber (near the bottom) while shielding the eyes of the observer. Keep the slide projector at least 18 inches from the chamber wall.
- Usage: Do not open the chamber during use, as this might ruin the cloud for a time.
After Use
- Drain the alcohol back into the bottle, dye it blue with food coloring, and keep it for miscellaneous cleaning purposes.
- Discard the dry ice, and set the whole setup to air dry overnight. Place the chamber on elevated blocks for air circulation underneath.
- Ensure the chamber is set to air dry. If left wet overnight, the finish may be damaged.
- Ethanol Disposal: Any leftover ethanol must be disposed of as hazardous waste.
Uses 95% ethanol -- keep ignition sources away, keep slide projector at least 18 inches away. Use caution when handling dry ice. Do not reuse ethanol for this demo but save the leftover for use in the elementary labs. Any disposal must be as hazardous waste.


